
Blog

Top 10 Tips for Welding 304 Stainless Steel

Welding 304 Stainless Steel looks straightforward, yet small process errors can leave permanent evidence. A gray heat tint may surround the bead. A sugar-like root may weaken the joint. Distortion can pull a clean panel out of shape. These problems often begin before the arc starts. Material identification, joint preparation, shielding gas, heat control, and post-weld cleaning all influence the final result.

Damian J. Kotecki, a respected welding-metallurgy specialist, has emphasized that “stainless steel is not one material, but a family of alloys with different welding behavior.” That principle applies directly to 304 stainless steel. Its corrosion resistance depends on preserving a clean, stable surface and avoiding unnecessary contamination. Carbon-steel brushes, dirty gloves, and iron particles can create trouble. They look harmless.

This guide presents ten practical tips for Welding 304 Stainless Steel, from selecting the correct filler metal to controlling interpass temperature. Each recommendation connects shop-floor technique with metallurgical reasoning. Expect details such as tight fit-up, short arc lengths, controlled travel speed, and proper backside shielding. The advice is practical, but not absolute. Joint design, thickness, position, and service conditions can change the best approach. A setting that works on a thin handrail may fail on a heavy process fitting. That distinction is easy to overlook. Careful welders still review their results, because even a sound-looking bead may hide oxidation, lack of fusion, or excessive heat input.
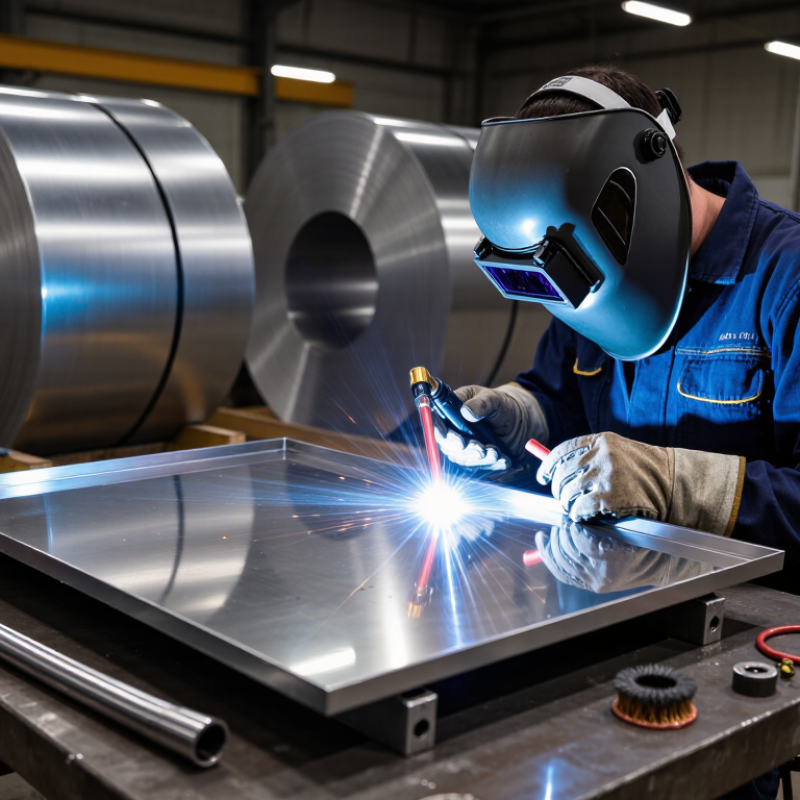
Top 10 Tips for Welding 304 Stainless Steel

Selecting Equipment and Filler Metal for 304 Stainless Steel

Top 10 Tips for Welding 304 Stainless Steel

Selecting suitable equipment and filler metal controls weld quality more than speed. The 2023 World Stainless Association report recorded about 58.4 million tonnes of stainless steel production worldwide. That scale makes consistent welding procedures essential. For 304 stainless steel, use a constant-current GTAW power source with DCEN, a gas lens, and a sharp tungsten electrode. Pure argon near 99.99% purity helps protect the arc. Keep the torch angle low and avoid excessive travel width. Keep it clean.

ER308L filler is the usual choice for 304 and 304L base metal. Its lower carbon content supports better resistance to sensitization. ISO 3581 classifies common stainless covered electrodes and wires, while AWS D1.6 provides structural stainless welding guidance. Check the qualified procedure before changing wire diameter or shielding gas. ER308LSi can improve GMAW wetting, but extra silicon may alter bead appearance and corrosion performance. Do not choose it only because the arc feels smoother.

Use dedicated stainless brushes and uncontaminated clamps. Even small carbon-steel particles can create rust-colored marks later. Maintain moderate heat input, short arc length, and an interpass temperature commonly below 150°C, unless the procedure states otherwise. Back-purge pipe interiors with argon when root oxidation matters. A gray, sugary root is a warning sign. Measure twice. A perfect setting on paper can still fail because of dirty joints, drafts, or poor fit-up. Experienced welders still recheck gas flow at the torch, not only at the regulator.

Top 10 Tips for Welding 304 Stainless Steel - Selecting Equipment and Filler Metal for 304 Stainless Steel
No. Welding Focus Recommended Equipment or Setting Filler Metal Selection Practical Guidance
1 Choose the correct process Use GTAW for clean, precise welds and thin material; GMAW for higher productivity; or SMAW for outdoor and maintenance work. GTAW: ER308L or ER308LSi
GMAW: ER308L or ER308LSi
SMAW: E308L-16
304 stainless steel is commonly welded with 308L-class filler metals because their composition is compatible with 304 base metal.
2 Select a suitable TIG power source Use direct current electrode negative (DCEN) with high-frequency arc starting and a foot pedal or fingertip amperage control. Use a 1.6 mm or 2.4 mm ER308L rod for many general-purpose joints, selected according to joint thickness and fit-up. DCEN provides concentrated heat at the workpiece and is the standard polarity for TIG welding stainless steel.
3 Use clean shielding gas For GTAW, use high-purity argon with a typical starting flow of approximately 7–9 L/min. For GMAW, use an argon-rich stainless-steel shielding mixture. ER308LSi can improve bead wetting in gas-shielded welding, but the shielding gas must remain suitable for stainless steel. Excessive gas flow can create turbulence and draw air into the arc. Protect the weld until it has cooled sufficiently to prevent oxidation.
4 Match filler size to material thickness Select electrode or wire diameter according to the joint thickness, welding position, and required deposition rate. Common TIG rod diameters include 1.6 mm, 2.4 mm, and 3.2 mm. MIG wire diameters commonly range from about 0.8 mm to 1.2 mm. A smaller filler diameter helps control heat on thin sheet, while a larger diameter can support heavier sections and larger joint gaps.
5 Control heat input Use the lowest practical amperage, a short arc, steady travel speed, and intermittent welds where the design permits. ER308L and E308L-16 are low-carbon options that help reduce the risk of chromium-carbide precipitation compared with standard higher-carbon 308 filler. Excessive heat can cause distortion, discoloration, reduced corrosion performance, and a wider heat-affected zone. Use multiple controlled passes when necessary.
6 Prepare and clean the joint Remove oil, moisture, paint, oxide, and other contaminants using stainless-steel-dedicated tools and a suitable solvent. Use clean ER308L, ER308LSi, or E308L-16 filler that has been stored in a dry, uncontaminated location. Do not use carbon-steel brushes or grinding wheels on stainless steel. Iron contamination can cause surface rust and impair corrosion resistance.
7 Protect the root side Use argon back-purging for open-root pipe, tubing, and full-penetration joints. Maintain enough purge coverage to prevent heavy root oxidation. ER308L is suitable for many 304-to-304 root passes. Choose filler based on the service requirements when joining 304 to another alloy. Sugaring or heavy oxidation on the root can create a rough, contaminated surface and may reduce corrosion resistance in service.
8 Limit interpass temperature Allow the joint to cool between passes and monitor temperature with a temperature indicator or contact thermometer. Low-carbon 308L-class filler is generally preferred for 304 stainless steel when repeated thermal cycles are expected. A commonly used control target is to keep interpass temperature below approximately 150°C, unless a qualified welding procedure specifies otherwise.
9 Choose the right transfer mode for MIG Use DCEP with parameters appropriate for short-circuit, pulsed, or spray transfer. Pulsed transfer can help reduce heat and spatter. ER308LSi may provide smoother wetting and a more fluid bead than standard ER308L in suitable gas-shielded applications. Follow a qualified procedure for wire-feed speed, voltage, travel speed, gas flow, and contact-tip-to-work distance because these variables interact.
10 Finish and inspect the weld Remove heat tint with an appropriate mechanical or chemical cleaning method, then inspect profile, fusion, penetration, and surface condition. Confirm that the filler classification matches the welding procedure and the required corrosion and mechanical performance. Cleaning after welding restores a more corrosion-resistant surface. For critical work, use the inspection and acceptance criteria specified by the applicable code or project standard.

Preparing the Joint and Cleaning the Welding Surface

Top 10 Tips for Welding 304 Stainless Steel

Preparing the Joint and Cleaning the Welding Surface

304 stainless steel demands disciplined surface preparation. ASTM A240/A240M specifies approximately 18–20% chromium and 8–10.5% nickel. These elements support corrosion resistance, but contamination can create visible defects. Remove oil, fingerprints, paint, and marker residue with an approved degreaser and lint-free cloth. Let the surface dry completely.

Tip 1: Use stainless-only tools. A dedicated stainless brush prevents iron contamination from carbon-steel particles. Brush in one direction, then wipe again. Do not touch the joint with bare hands. Small details matter.

Tip 2: Prepare a clean, square joint. Remove burrs and sharp edges with a dedicated abrasive wheel. Avoid overheating the edge during grinding. ASM Handbook data lists 304 thermal conductivity near 16.2 W/m·K and thermal expansion near 17.2 µm/m·K at room temperature. Heat can therefore concentrate and distort the joint. I sometimes underestimate this effect on thin sheet.

Tip 3: Check the fit-up under strong lighting. Keep the root opening consistent and remove trapped moisture. AWS D1.6/D1.6M emphasizes cleanliness, controlled procedures, and suitable stainless welding practice. Place short, balanced tacks to reduce movement. Clean each tack before continuing.

Use separate gloves for preparation and welding. Store the material away from grinding dust and damp floors. A final solvent wipe is not a substitute for proper grinding. Reinspect the groove immediately before striking the arc.

Setting Heat Input, Current, and Shielding Gas Correctly

Welding 304 stainless steel demands controlled heat, steady current, and clean shielding. Use a qualified welding procedure as your baseline, not guesswork. For TIG work, begin with direct-current electrode negative and pure argon. Set gas flow around 10–15 L/min, then adjust for nozzle size and workspace airflow. Excessive flow can create turbulence and draw air into the arc. Keep it clean. Remove oil, oxide, and fingerprints with dedicated stainless-steel tools.

Set amperage according to thickness, joint design, and welding position. Thin sheet usually needs lower current, shorter arc length, and faster travel. A broad, slow puddle can produce distortion, sugaring, or reduced corrosion resistance. Watch the puddle. For MIG welding, choose a stainless-compatible shielding mixture and confirm its recommended flow range. Poor gas coverage often leaves dark, rough bead surfaces and hidden contamination.

Track heat input instead of judging color alone. A useful estimate is voltage multiplied by amperage, multiplied by 60, divided by travel speed in millimeters per minute. Include process efficiency when your procedure requires precision. Increase travel speed or reduce current when the joint becomes excessively hot. Keep interpass temperature controlled, especially on repeated passes. Back-purge tubing and full-penetration joints with argon when the root must remain corrosion resistant. Tack welds should be balanced and evenly spaced. I sometimes recheck fit-up too late; that mistake adds heat and correction work. Record actual settings, gas flow, material thickness, and travel speed for the next weld.

Applying Welding Techniques to Control Distortion and Defects

Top 10 Tips for Welding 304 Stainless Steel

Applying Welding Techniques to Control Distortion and Defects

304 stainless steel conducts heat poorly, at about 16.2 W/m·K, while expanding near 17.2 µm/m·°C, according to ASM Handbook, Volume 6A. That combination drives warping. Keep joint gaps uniform, usually near the qualified procedure value, and remove oil, oxide, and carbon-steel dust. Use a clean stainless brush. Short arc lengths and controlled travel speeds reduce excess heat. Lower heat input helps, but excessively fast travel can cause lack of fusion.

Purge the root with clean argon when the backside will serve as corrosion-resistant weld metal. A dull gray or black root signals inadequate shielding. Use firm tack welds, equal spacing, and a balanced sequence. Skip welding around the joint instead of building one long hot pass. Copper chill bars can absorb heat, although poor contact can create uneven cooling. Keep interpass temperature within the qualified procedure; many fabrication procedures set a limit near 150°C. Do not rely on appearance alone.

AWS D1.6 and ISO 5817 emphasize controlled profiles, fusion, and surface discontinuities during acceptance inspection. Check each pass for undercut, overlap, porosity, and crater cracks. Dye penetrant testing can reveal surface-breaking defects after cleaning. I still see skilled welders overheat the final pass while correcting a small visual flaw. That correction may increase distortion. Measure alignment before welding, between passes, and after cooling. Record amperage, voltage, travel speed, purge flow, and interpass temperature. Small records expose large habits.

Top 10 Tips for Welding 304 Stainless Steel: Applying Welding Techniques to Control Distortion and Defects

Calculated heat input decreases as travel speed increases when voltage, current, and arc efficiency remain constant. Lower, controlled heat input generally helps reduce distortion and limits excessive discoloration, while the qualified welding procedure must always determine the final settings.

Heat input is calculated using Q = η × V × I × 60 ÷ S, where η is arc efficiency, V is voltage, I is current, and S is travel speed. This example uses 120 A, 13 V, and 60% arc efficiency; actual values depend on the welding process, joint design, material thickness, shielding, and approved WPS.

Practical Welding Tips

  1. Remove oil, moisture, oxide, and other contaminants before welding.
  2. Use stainless-steel-dedicated brushes and tools to prevent iron contamination.
  3. Use accurate fit-up and consistent joint gaps to reduce uneven shrinkage.
  4. Control heat input with suitable current, voltage, and travel speed.
  5. Use short, controlled weld beads instead of unnecessarily wide beads.
  6. Apply intermittent or skip welding where the design permits it.
  7. Use balanced welding sequences and alternate sides to limit distortion.
  8. Use adequate tack welds to maintain alignment during welding.
  9. Apply back purging for stainless-steel root passes when required by the joint design.
  10. Control interpass temperature and inspect for porosity, cracking, undercut, and discoloration.

Inspecting, Cleaning, and Finishing the Completed Weld

Inspecting, Cleaning, and Finishing the Completed Weld

A completed 304 stainless steel weld needs more than a smooth appearance. Let the joint cool naturally, then inspect it under bright, even lighting. Check for cracks, undercut, incomplete fusion, pinholes, excessive heat tint, and uneven bead width. A small mirror or magnifier can reveal defects near the backside and at the weld toes. Measure distortion when fit-up or dimensional accuracy matters.

Tips: Use clean inspection tools. Contamination can hide defects or create new ones.

Remove slag, spatter, and discoloration with tools reserved for stainless steel. Carbon-steel brushes can embed particles that later rust. Wipe the surface with a suitable solvent and lint-free cloth. Avoid chloride-containing cleaners, especially near food, water, or corrosive service. For heavy heat tint, use an approved mechanical or chemical treatment handled according to its safety instructions. Rinse thoroughly when required, then dry the joint completely.

Finishing should preserve the base metal’s surface character. Blend high spots gradually, using progressively finer abrasives. Do not grind deeply into the toe or erase evidence needed for inspection. I have seen attractive welds fail closer examination because finishing covered a shallow undercut. That is an easy mistake to repeat. Reinspect after cleaning and finishing, preferably from several angles. If the surface still feels rough under a gloved fingertip, more work may be needed. If uncertainty remains, request a qualified visual or non-destructive inspection.

FrenchBulgaria
